As the creator of the Sudachi Emulator, it’s my pleasure to guide you through the exciting journey of bringing Nintendo Switch games to your Android device. The Sudachi Emulator is meticulously designed to unleash the full potential of Nintendo Switch gaming in the palm of your hands.
This comprehensive guide aims to simplify the setup process for you, ensuring a smooth and enjoyable gaming experience on your Android device.
Setting Up Sudachi Emulator on Your Android Device
1. Prepare for Installation
Getting started with Sudachi Emulator on Android is straightforward. Here’s how:
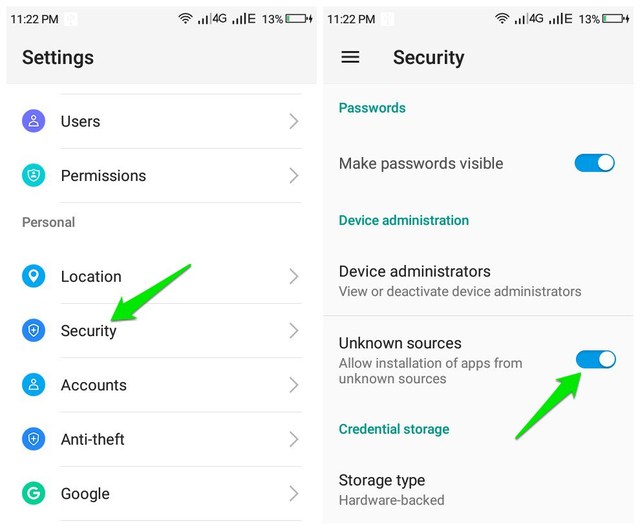
1. Before installation, ensure your device is set to allow installations from unknown sources. Navigate to Settings > Security, and toggle on Unknown Sources. This allows you to install apps outside of the Google Play Store.
2. Now as the emulator is not available on PlayStore, go to the Sudachi Download Page and download the latest APK file.
2. Install and Prepare Sudachi Emulator
With the APK file downloaded, you’re just a few taps away from installation:
1. Locate the downloaded Sudachi Emulator APK in your device’s Downloads folder. Tap on it to begin the installation process.
2. Your device will ask for confirmation to install the app. Confirm the installation and wait for the process to complete. The Sudachi Emulator icon will appear on your home screen or app drawer upon successful installation.
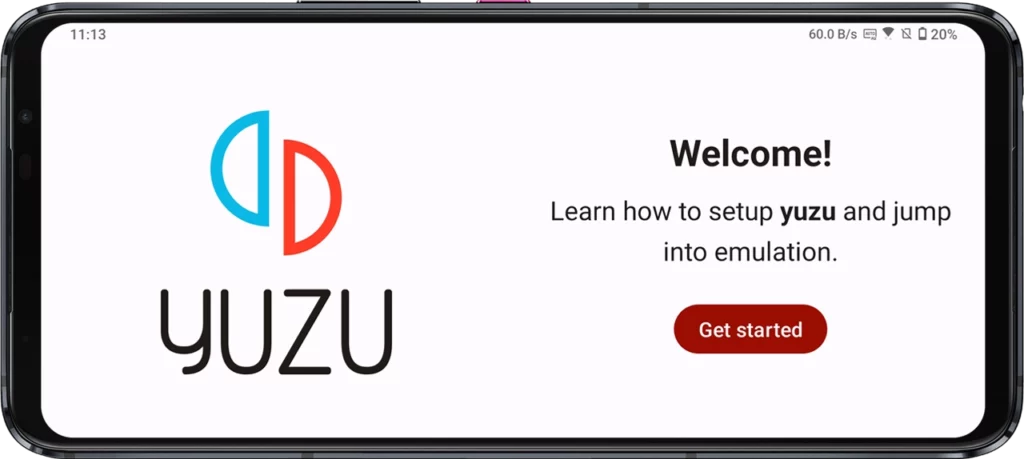
3. Open the Sudachi emulator. Tap the “Get Started” button on the opening screen.
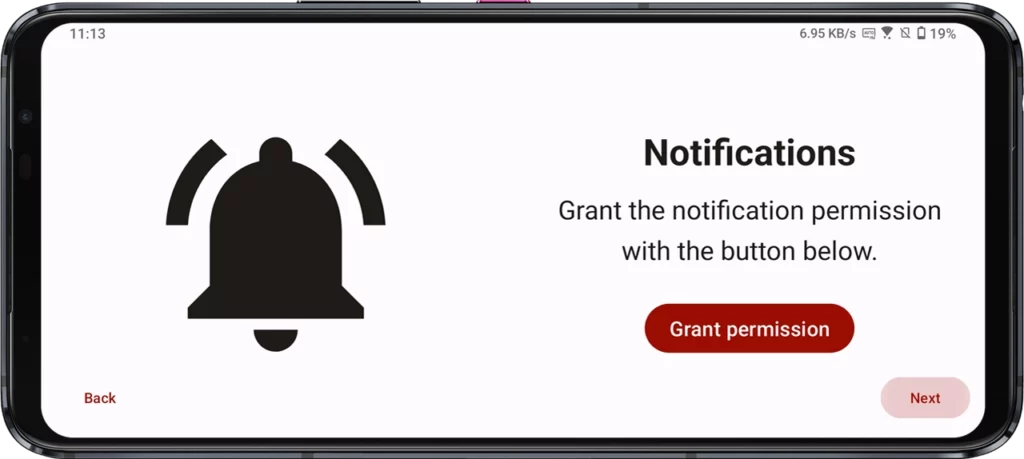
The app may request notification permissions. Granting this is optional. Tap “Next” to continue.
3. Setup Keys
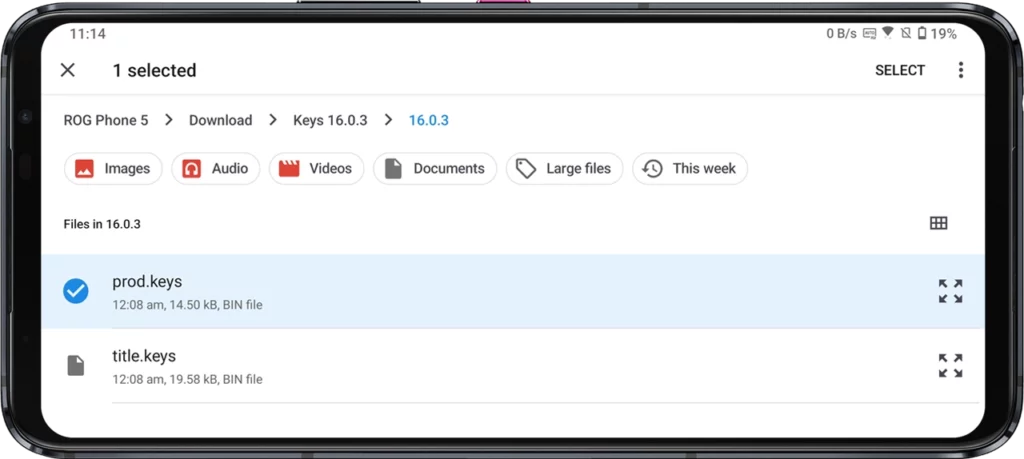
1. You’ll be prompted to select your prod.keys file. If unfamiliar with prod.keys or how to obtain it, use the link provided to download it. Remember to extract the zip file to access the prod.keys file directly.
2. Tap “Select Keys” button to select the location where you have extracted the keys file.
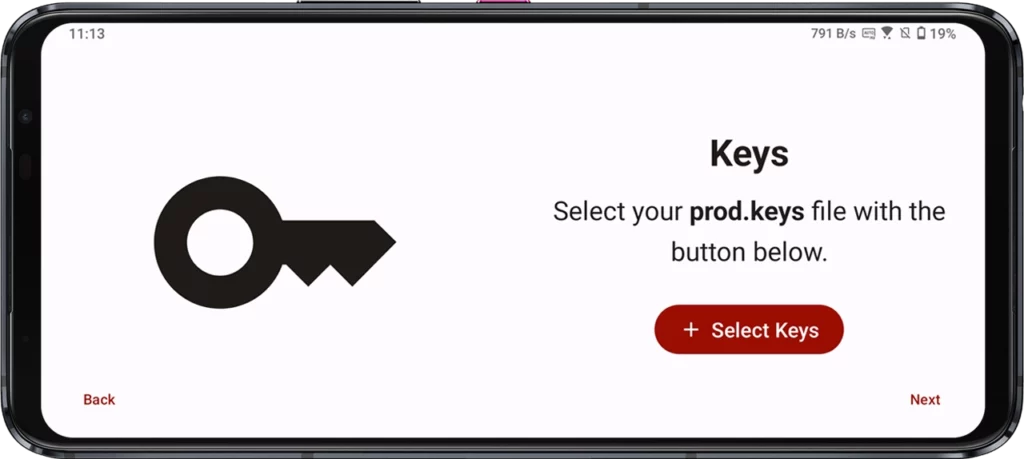
Now, navigate to the location and tap on the prod.keys file to select it.
3. A confirmation message, “Keys successfully installed,” will appear. Hit “Next.”
4. Setup Game Directory
1. The emulator will ask you to select your Games directory. Tap “Add Games” and either select an existing folder or create a new one named “Games.”
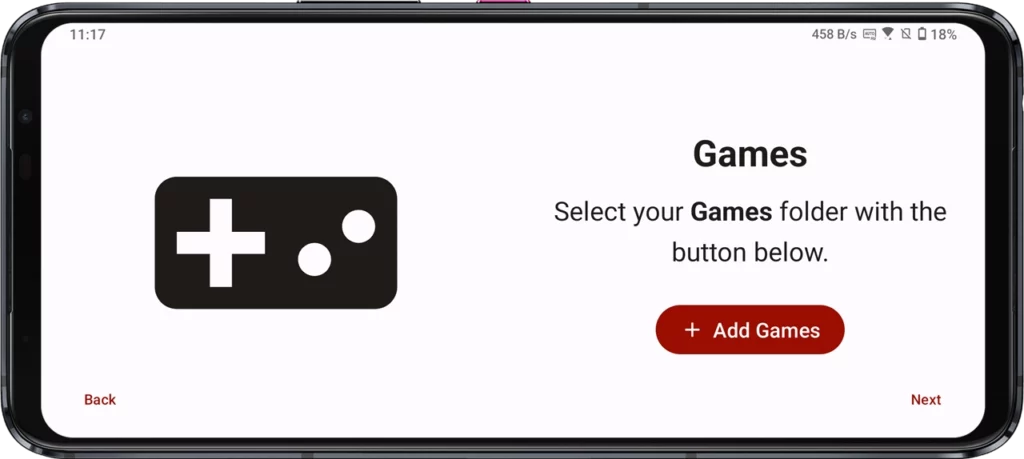
2. A message, “Games directory selected,” will confirm your selection.
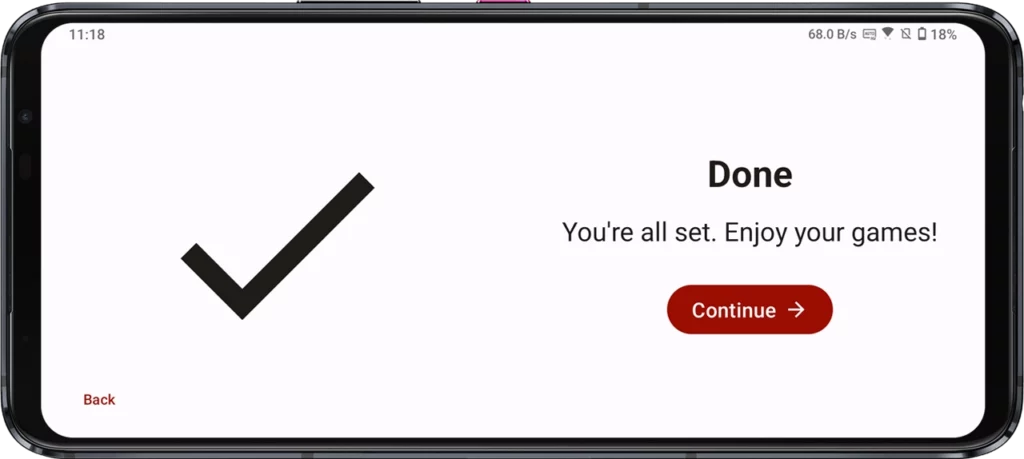
3. Click “Next,” then “Continue” on the screen that confirms, “You’re all set. Enjoy your games!”
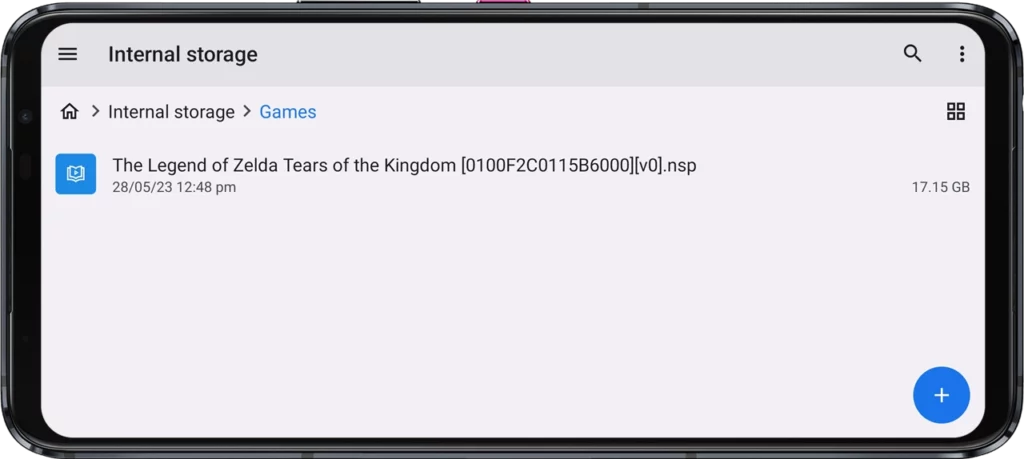
5. Add Games
With the Sudachi emulator set up, it’s time to add your game ROM files (NSP, XCI) to the designated Games folder.
1. Download the NSP or XCI file of your desired game.
2. Using your device’s file manager, move the downloaded ROM file into the “Games” folder you previously selected or created.
Close the file manager. If your game does not appear in the emulator immediately, try refreshing by swiping down on the screen.
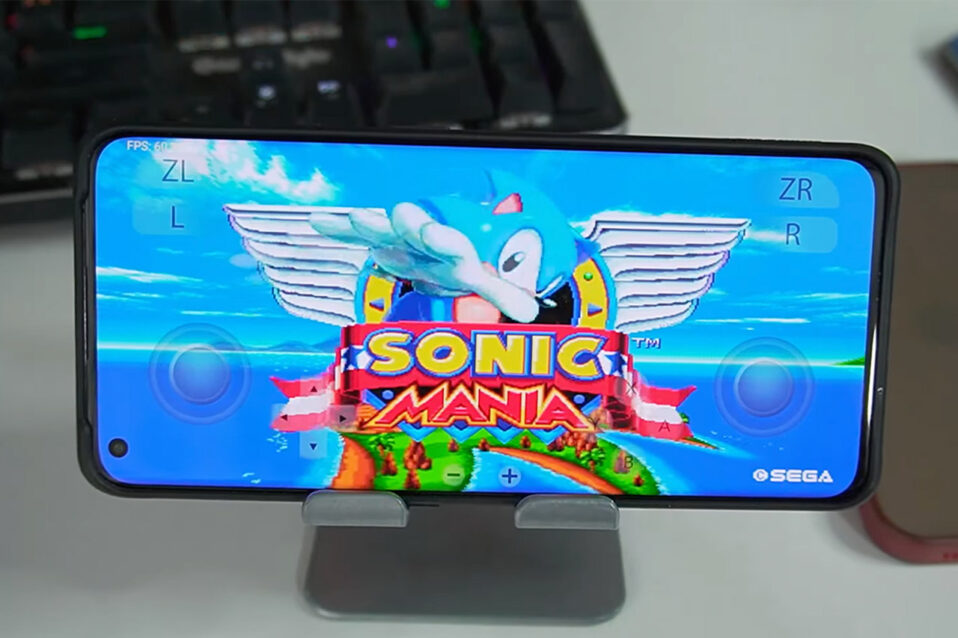
Now, everything is set for you to enjoy Nintendo Switch games on your Android device.
Reopen the Sudschi Emulator. The games added to your folder, such as “The Legend of Zelda: Tears of the Kingdom,” should now be visible.
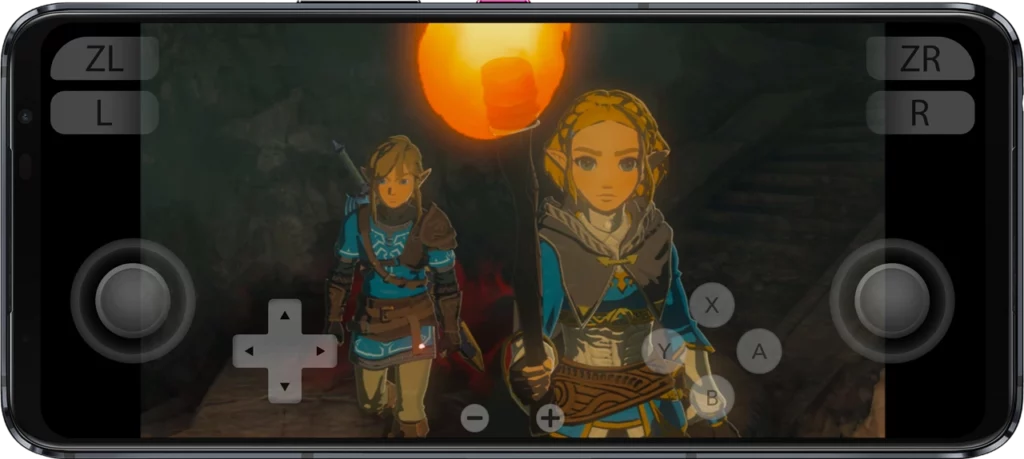
Tap on the game you wish to play. The game will launch, ready for you to explore and enjoy.
You’ve successfully set up the Sudachi Emulator on your Android device. With these simple steps, the world of Nintendo Switch gaming is now at your fingertips. Enjoy exploring new titles or diving back into your favorites, anytime, anywhere.